
When I was buying my first log cabin, I spent a fair amount of time umming and ahhing about whether to do a self-assembly or to pay for some pros to assemble the cabin. In the end, I went for self-assembly, which turned out to be much easier than I expected.
Build a Log Cabin From Scratch Or Assemble a Flat-Pack
Initially, I researched a self-build from scratch versus a bought flat pack that I assembled. I quickly came to the conclusion that building a cabin from scratch wasn’t going to be easy and would roughly cost the same price as a flat-pack log cabin.
Delivery Of Garden Log Cabin
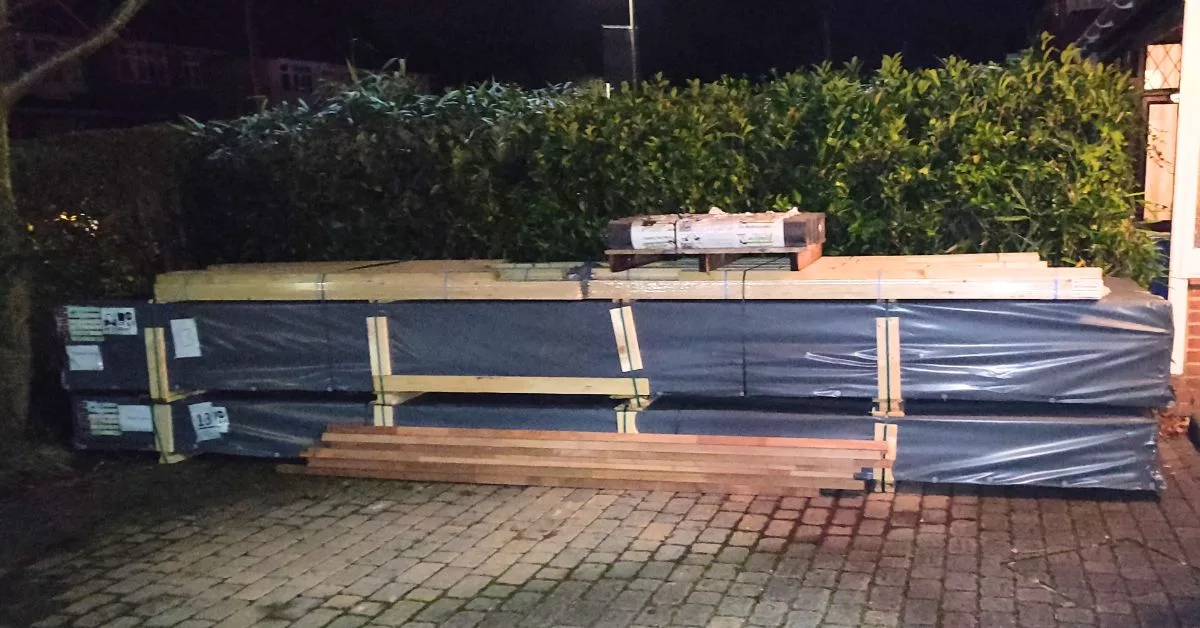
The log cabin I ordered was delivered by a very large lorry that had a forklift on the back. The delivery consisted of two pallets, each about 1.2 meters wide, 5 meters long, and weighing one ton each.
When you order a log cabin, read the delivery information, as cabin suppliers have different arrangements and requirements.
Unpacking A Log Cabin
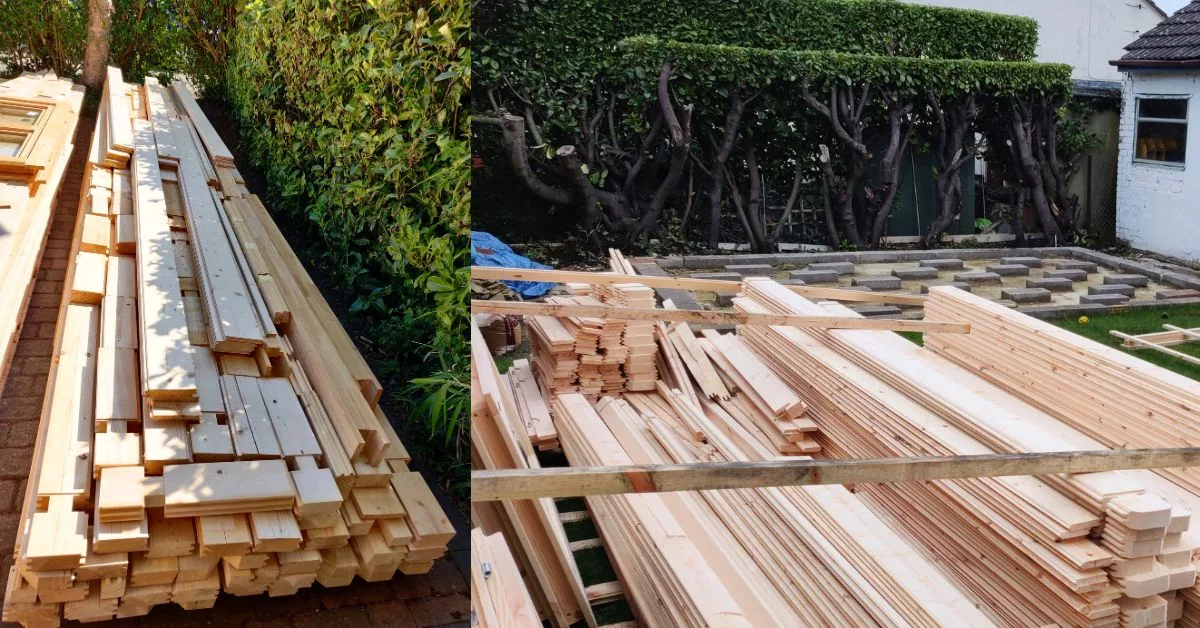
A log cabin has many parts, and unpacking takes quite a while. I had to unpack my log cabin on the front drive and carry all the wood to the back of the house, where it would be assembled. It took me (I had no help) about four hours for me to unpack and move all the parts to the back of the house.
No products found.
Tips when unpacking
- Sort all the wood so that the same pieces are piled together. It will make assembling the cabin much easier.
- Place some old wood on the ground and unpack the log cabin onto the old wood. If you place the cabin logs directly on the ground, they may get wet and dirty.
- Ideally, unpack a day or two before you plan on assembling the cabin. This is because unpacking is a bigger task than you might think.
- Check off all the parts as you unpack to make sure nothing is missing. The assembly guide will have a page listing all the parts and quantities.
Assembling A Garden Log Cabin
Before you start to assemble the cabin, go through the assembly guide. Try and get a rough understanding of the assembly stages and how the parts connect.
I’ve assembled a number of log cabins, and the assembly instructions for all of them were not very clear.
VERY IMPORTANT: Before you start to assemble the cabin, it is really important that the base the cabin is going to be built on is perfectly flat.
No products found.
Tools Required For Assembling A Log Cabin
Most self-assembled log cabins require very few tools to erect them. The majority of the cabin parts slot together, and gravity then holds them in place.
List Of Tools
- Rubber mallet
- Long spirit level
- Ladder
- Hammer
- Drill (with screwdriver function)
- Wood Saw
- Tape Measure
- Stanley Knife
- Large Builders Set Square (Optional)
The Foundations Beams
The cabin foundation beams are the first components of the cabin that are installed. The cabin sits on top of the foundation beams, which protect the cabin logs from damp \ water. The foundation beams are usually pressure-treated or made from plastic to prevent rotting.
In the picture below, the dark brown wood is the foundation beams.
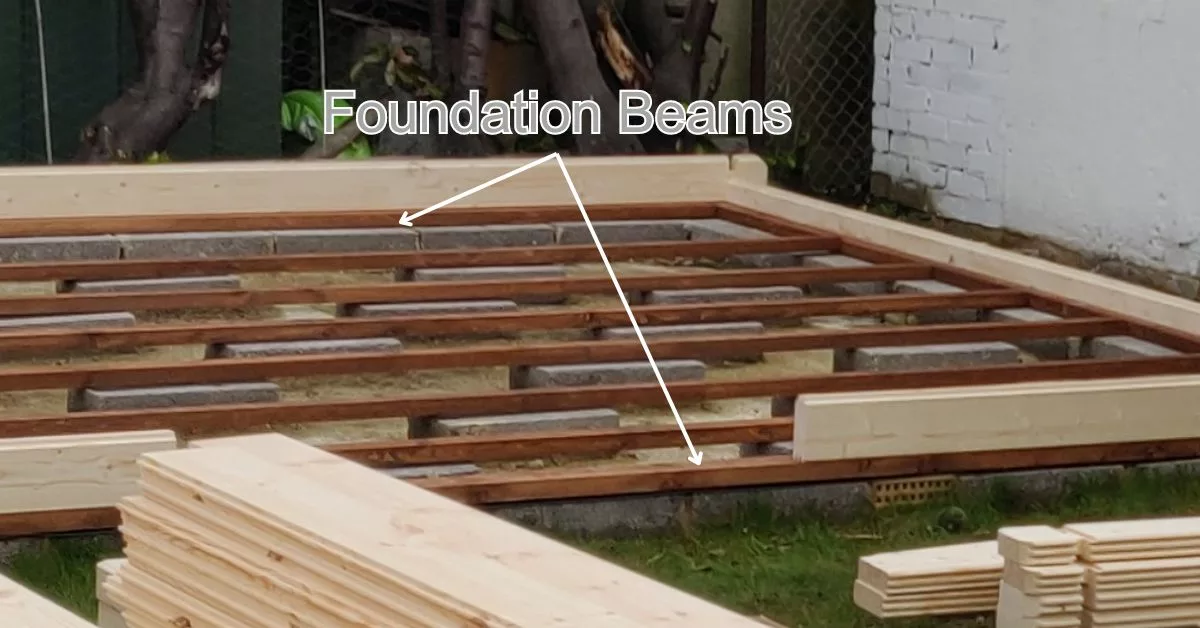
For additional protection from moisture, I have placed some damp-proof membrane under the foundation beams.
The foundation beams have been screwed down onto the log cabin base. It is super important that the foundation beams are perfectly level and angled at 90 degrees to prevent problems later. This is where the large builders’ set square and spirit level come in handy.
No products found.
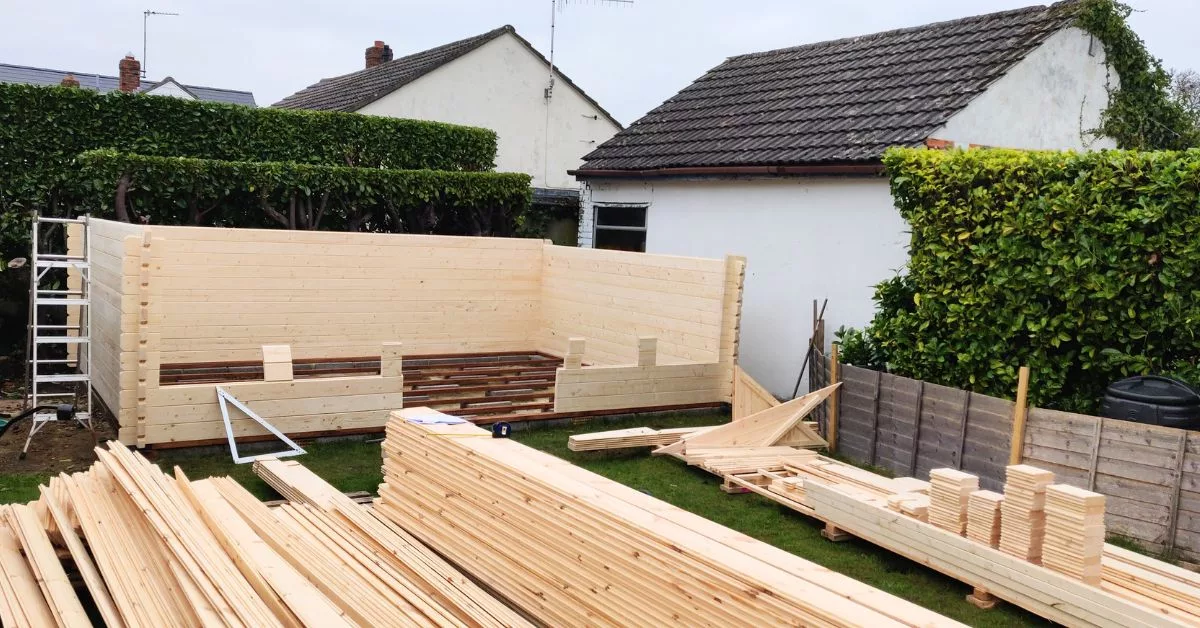
Assembling the cabin walls
After laying the foundation beams, start building up the cabin walls. The wood that makes the cabin walls usually just slots into each other. It is only necessary to screw the bottom row of wood that makes the walls to the foundation beams. The rest of the wall does not need to be screwed together.
Use the rubber mallet to knock each wall section to the previous section. Make sure that the wood is firmly joined.
Use the spirit level occasionally to ensure the wall is level as you build it up.
Carefully follow the instructions that come with the cabin as you build the walls.
Top Tip: Be aware that some pieces of wood look very similar but are subtly different.
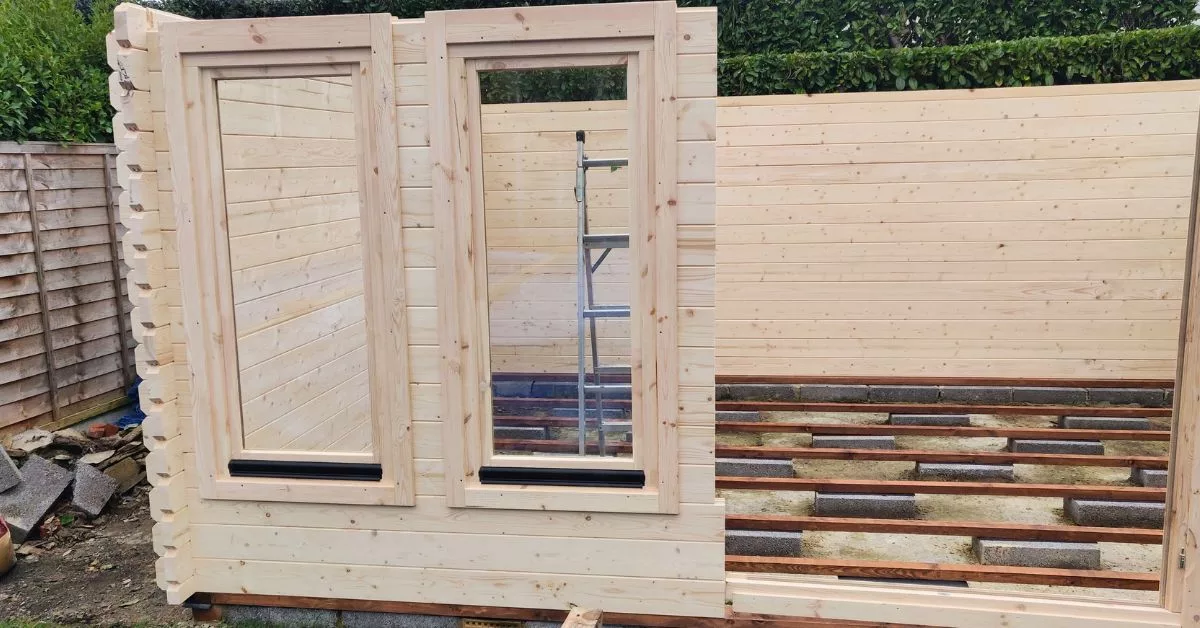
Installing the Window(s) And Door(s)
At some point, while building the walls, you will have to slot in the cabin window and door frames. The important thing here is to make sure everything is perfectly straight and level. Otherwise, you will have problems opening and closing the doors and windows.
A gap will be between the wall and the window & door frame. This is to allow for the expansion and contraction of the wood throughout the year.
Install Cabin Roof Rafters
Once the cabin wall, window & door frames have been installed, the roof rafters should be installed. Make sure the rafters are fully knocked down into position and level.
Install Cabin Roof Boards
The way to lay the roof boards will vary from cabin to cabin. The cabin assembly guide will give the best advice on installing the roof boards.
The main tip I’d give when installing the roof boards is to ensure the first roof board is straight and in the correct position.
No products found.
Insulation For Log Cabin Roof
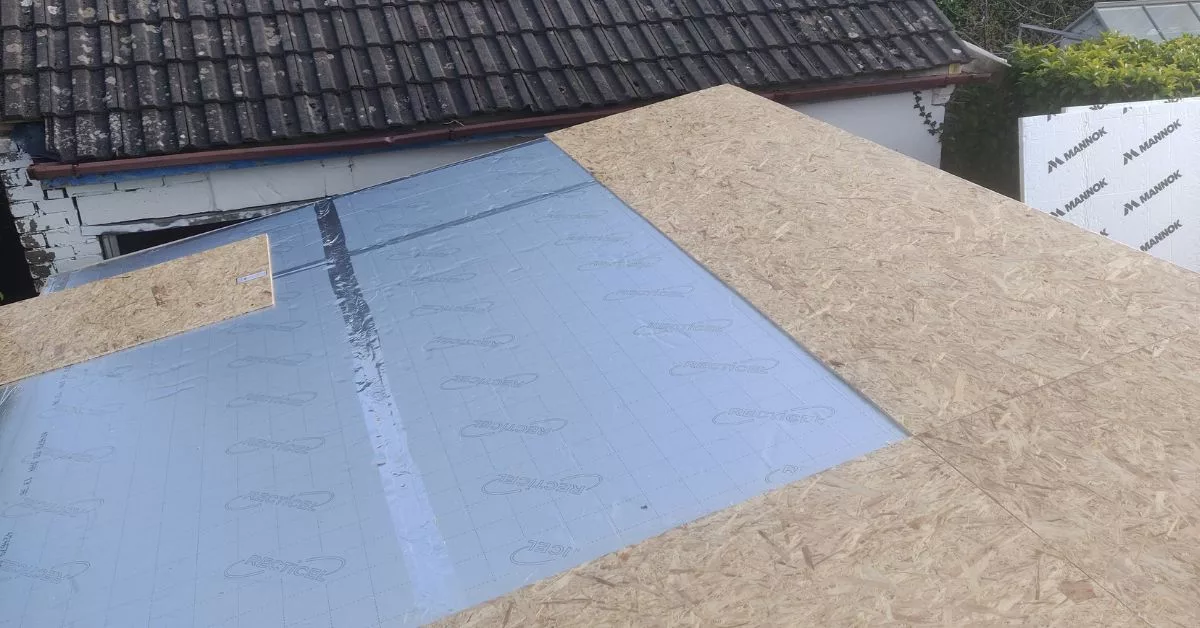
I strongly recommend installing roof insulation if you want to keep your log cabin warm all year round. My cabin didn’t come with roof insulation, but it was fairly easy to add.
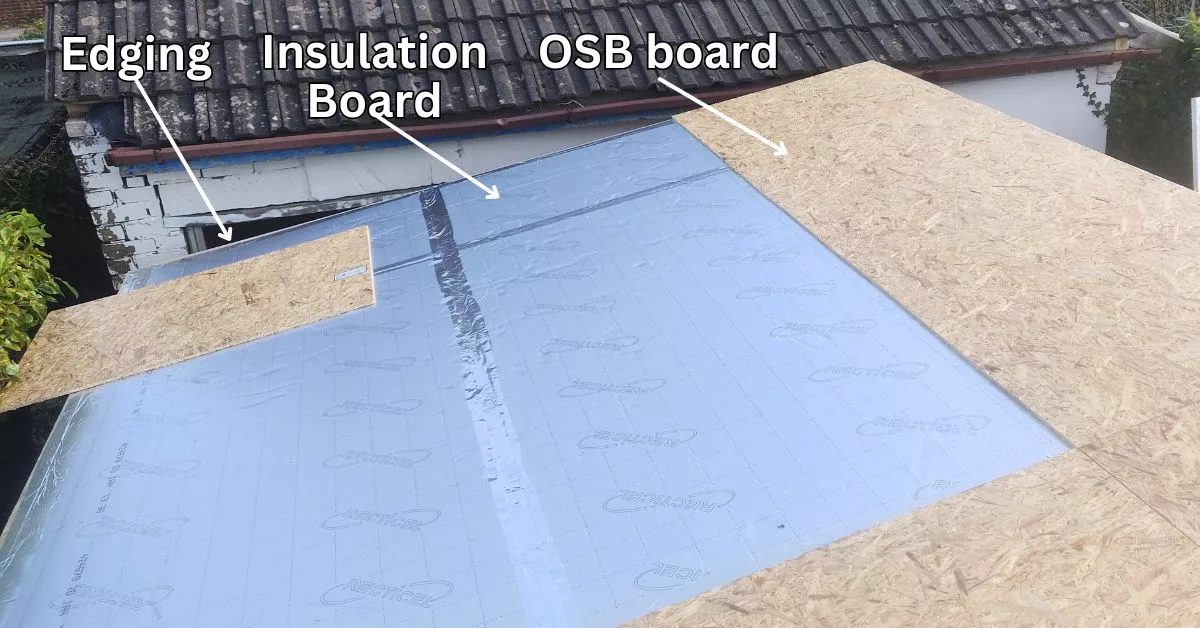
- Nail edging all the way around the roof. The height of the edging should be the same as the thickness of the insulating boards that will be used.
- Cover the roof with insulating boards. I used 50mm thick Recticel foam insulation boards covered with silver foil.
- Cover the insulation boards with OSB boards, I used 9mm thick OSB. Nail the OSB boards to the roof edging to hold them in place.
No products found.
Lay Cabin Roof Felt
I attempted to lay the roof felt that came with the cabin but found it very difficult to work with, mainly because it kept tearing. I’m not sure if the felt I got with the cabin was very cheap or if roof felt is just prone to ripping.
I ended up buying polyester roof felt, which is much lighter, stronger and easier to install than the felt that came with my cabin.
Top Tip: Before laying the roof felt, think about how best to use the felt to cover the roof. For example, you don’t want to lay the roof felt so there’s a join on the arch of the roof or the felt is just a few cm short of covering the edge etc
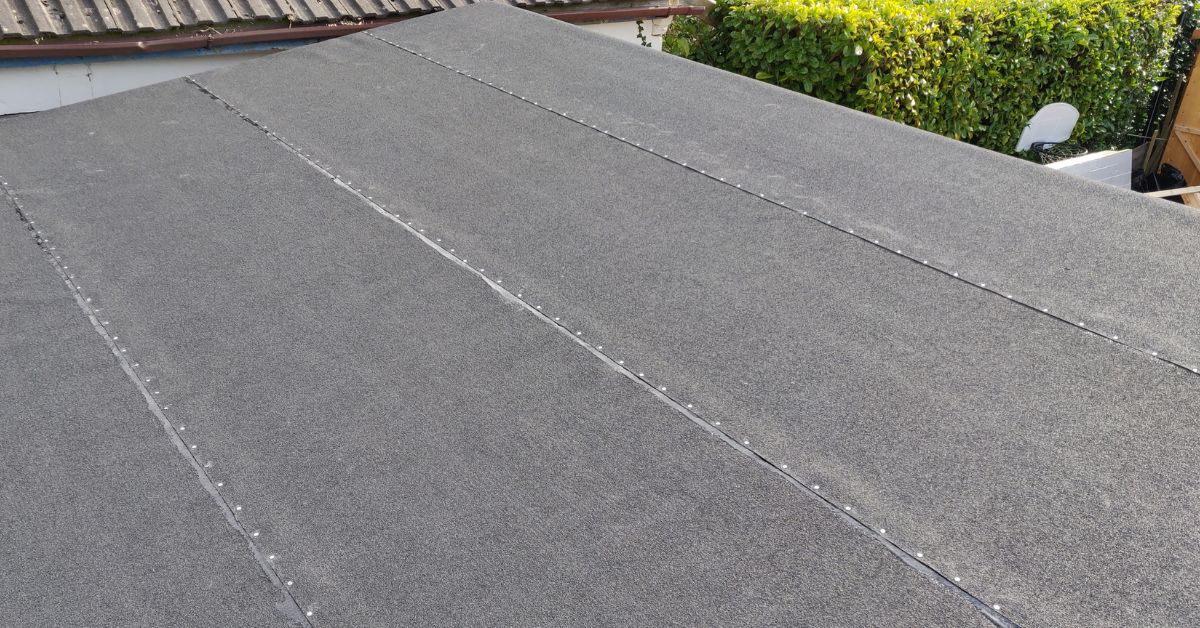
To install the polyester roof felt:
- Unroll the first roll of felt on the roof, ensuring there are no creases and it is perfectly smooth against the roof.
- Paint on bitumen roof felt adhesive along the edge where the next roll of roof felt will be laid on top. The adhesive should be about 5cm wide.
- Unroll the next roll of roof felt overlapping the 5cm where the adhesive has been applied.
- Again, make sure the roof felt is straight and smooth.
- Hammer in galvanised roof felt nails every 5cm, attaching the felt to the roof.
No products found.
Install Floor Joists For Log Cabin
The floor joists are the timber that the floorboards will be laid on. The joists raise the floorboards off the ground so they don’t get wet \ damp. The joists are supplied as part of the floorboard pack.
- If your cabin has a slab or concrete base, put a damp-proof membrane down, covering the entire cabin floor. Or, If your cabin is raised (like mine in the pictures), then put a damp-proof membrane under each of the joists where they make contact with the base.
No products found.
- Install the joists about 40cm apart and in the opposite direction to how the floorboards will be laid on top.
- Once all the joists are in position, screw them to the base. Use countersunk concrete screws and drill using an electric drill in ‘hammer’ mode. In an ideal world, you should probably drill holes in the concrete \ slabs and use raw plugs.
No products found.
TIP: Use good quality screws. The cheaper ones are prone to snapping. - Make sure the joists are all level with each other in all directions.
Install Floor Insulation
My cabin didn’t come with any floor insulation. But, like the roof insulation, it is fairly easy to install your own floor insulation.
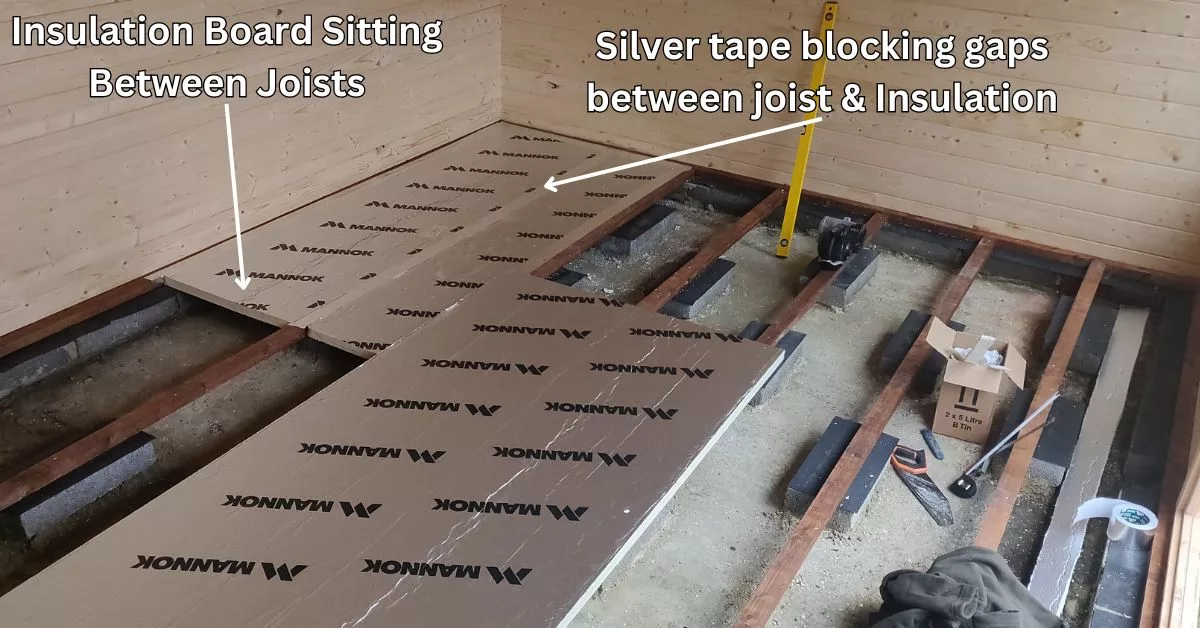
How to install log cabin floor insulation.
- The surface the insulation will sit on should first be covered with a damp-proof membrane.
- Cut the insulation boards to size to fit in between the joists. See the picture below.
No products found.
TIP: Some log cabins have floor and roof insulation as an optional extra. I found it was much cheaper to buy insulation independently.
Laying Cabin Floorboards
Both the cabins I’ve assembled have had floating floors (I think most do). This means the cabin walls don’t sit on the floor. There is a gap between the floor and cabin walls. Having a floating floor allows the cabin to be assembled before the floor is installed.
No products found.
Top Tips:
- If your budget allows and the cabin you’re buying has the option, get the thickest floorboards available. Thicker floorboards provide better insulation and are less prone to flexing and creaking.
- Before laying the cabin floorboards, ensure no water is inside the cabin.
- Ensure all the joists the floorboards sit on are perfectly level.
- Facing the floorboards away from the entrance looks nicer and makes the cabin feel bigger.
Installing A Floating Floor
- Log cabin floorboard packs are usually generic. They are designed to fit any cabin. This means the floorboards must be cut to the correct size for the cabin they’re being installed in.
No products found.
- The floating cabin floors I’ve installed have been tongue and grove. With a rubber mallet, smack the floorboards together. Ensure the floorboard ‘tongue’ is firmly knocked into the ‘groove’ of the previous floorboard.
TIP: It is best to hammer the ‘tongue’ into the ‘groove’ rather than the ‘groove’ into the ‘tongue’. So, when you lay the first floorboard, ensure the ‘tongue’ faces the wall.
- Once the floorboard is positioned, nail it to the joists underneath.
- Repeat the steps above until all the floorboards are in place.
- The last floorboard to be installed will most likely need cutting to fit the gap between the floor and the cabin wall.
- Once all the floorboards are in place, attach the skirting boards around the edges to cover the gaps between the floor and the cabin wall.
Conclusion: How To Assemble A Garden Log Cabin In The UK
Assembling a flat-pack garden log cabin is far easier than you might think. You will find it fairly straightforward, even with minimal DIY skills.
The only tricky part is the cabin base. Unless you know what you’re doing, I’d recommend getting a professional to do the cabin base, as it needs to be solid and perfectly level.
The cabin in the pictures took me about two days to erect the cabin walls and roof boards. I had some help slotting the door and window frames in, but that was it.
No products found.
FAQ: Assembling a Log Cabin
What size log cabin can I have without planning permission?
In the UK, you can often have a garden log cabin without needing planning permission, thanks to rules on “permitted development” for outbuildings.
However, there are specific criteria your cabin must meet to be exempt from planning permission:
-
Purpose and Use:
The cabin should not be used as a separate dwelling to live in and must be incidental to the main house, such as for use as a garden office, gym, or storage. -
Size and Height Restrictions:
- The cabin must not cover more than half the garden area.
- If the cabin is within 2 metres of a boundary, the whole building should not exceed 2.5 metres in height.
- For cabins more than 2 metres from the boundary, eaves height should not exceed 2.5 metres, with an overall height of no more than 4 metres for a dual-pitched roof, or 3 metres for any other roof.
- The cabin must not cover more than half the garden area.
-
Location:
- The cabin should not be forward of the principal elevation or side elevation fronting a road.
- Outbuildings are not permitted development within the grounds of a listed building.
- The cabin should not be forward of the principal elevation or side elevation fronting a road.
-
Design:
- The materials used should be similar in appearance to the existing house (though this is more a guideline for most local authorities).
In designated areas such as National Parks, Areas of Outstanding Natural Beauty, Conservation Areas, and World Heritage Sites, stricter limits apply, and you may need planning permission for buildings over 10 square metres, even if they are more than 20 metres from any wall of the house.
Check with your local planning authority before proceeding, as local rules and interpretations of the national guidelines can vary. Additionally, if your home is a listed building or you live in a designated area, there may be further restrictions.
How Long Does It Take To Put Up A Log Cabin?
Mileage will vary depending on the size of the cabin. Below is how long it took me to assemble my 4m x 5m (44mm walls) cabin (the one in the pictures).
- 4 hours to unpack and move all the wood to the back of the house
- 2 days to erect walls and put roof boards on
- 1.5 days to add roof edging, install roof insulation boards, OSB boards and roof felt
- 1.5 days to install floor joists, floor insulation and floorboards
I did the entire build on my own, apart from some help with the doors and windows.
I did the build over a three week period.
The bit that took absolutely ages was all the painting and finishing off!
No products found.
Can I Assemble a Log Cabin On My Own
Both the cabins I’ve assembled I did on my own. Assuming the cabin isn’t massive with very heavy wood, I’d say ‘yes’ you can assemble a log cabin on your own.
If I had help from someone else, I think the time to assemble the cabin would have been easily less than half the time it took me on my own
Do I Need To Be Good At DIY To Assemble A Log Cabin?
No. If you can follow instructions, you can assemble a log cabin. It’s probably easier to do than some furniture flat packs from Ikea.
What is tongue and groove floor?
A tongue and groove floor refers to a type of flooring construction where individual planks or boards are designed with interlocking edges. The term “tongue and groove” describes the way the boards fit together.
Here’s a breakdown of the components:
-
Tongue: One side of the board has a protruding edge called the “tongue.” This is a narrow, elongated piece of wood that sticks out.
-
Groove: The opposite side of the board has a corresponding recessed area called the “groove.” The groove is a channel or slot that runs along the length of the board.
How much does it cost to build a log cabin?
Doing it yourself will only cost you your time and about £100 on various tools required to build the cabin.
The cost of building a cabin by a professional will depend on the size of the cabin and the complexity (e.g., a single or multi-room cabin) of the build. It will also depend on what work you want the professional to do. For example, will you want a professional to build the foundations, add insulation and paint the log cabin etc.
No products found.